
- Info about the game
- Installing
- Running (Win9x or above)
- Running (WinXP or above)
- Proper widescreen
- Running (Win10 or above)
1. Info about the game
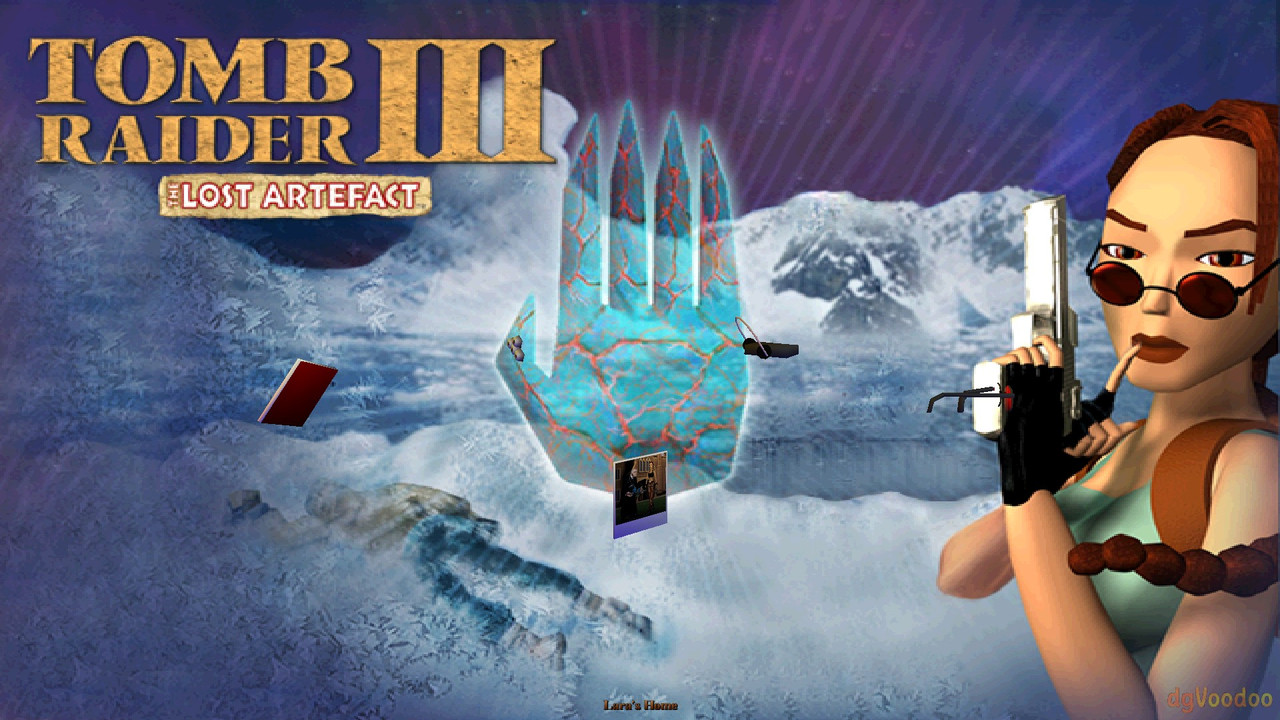
Tomb Raider: The Lost Artifact is a mini-sequel to Tomb Raider 3, comparable in function to earlier Gold releases of the first two games. But it was, unlike those, released separately.
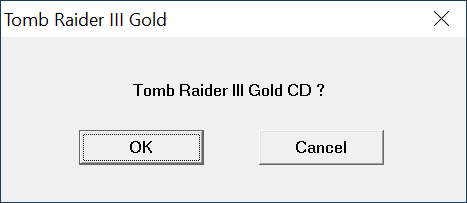
Since TLA requires its own CD (unlike previous “Gold” releases), I’ve decided to make a separate post about it.
Developer: Core Design Ltd.
Resources:
2. Installing
2.1.a) Insert your original CD into the CD/DVD drive,
or:
2.1.b) Buy the game on GoG or Steam and only then download CD image from archive.org. Extract .bin & .cue files, mount the CD image in ImgDrive or similar software.
2.2) Autorun should run autorun.exe (run it manually if you disabled Autorun for CD/DVD drives):

2.3) Install the game. Don’t install DirectX 6.1.
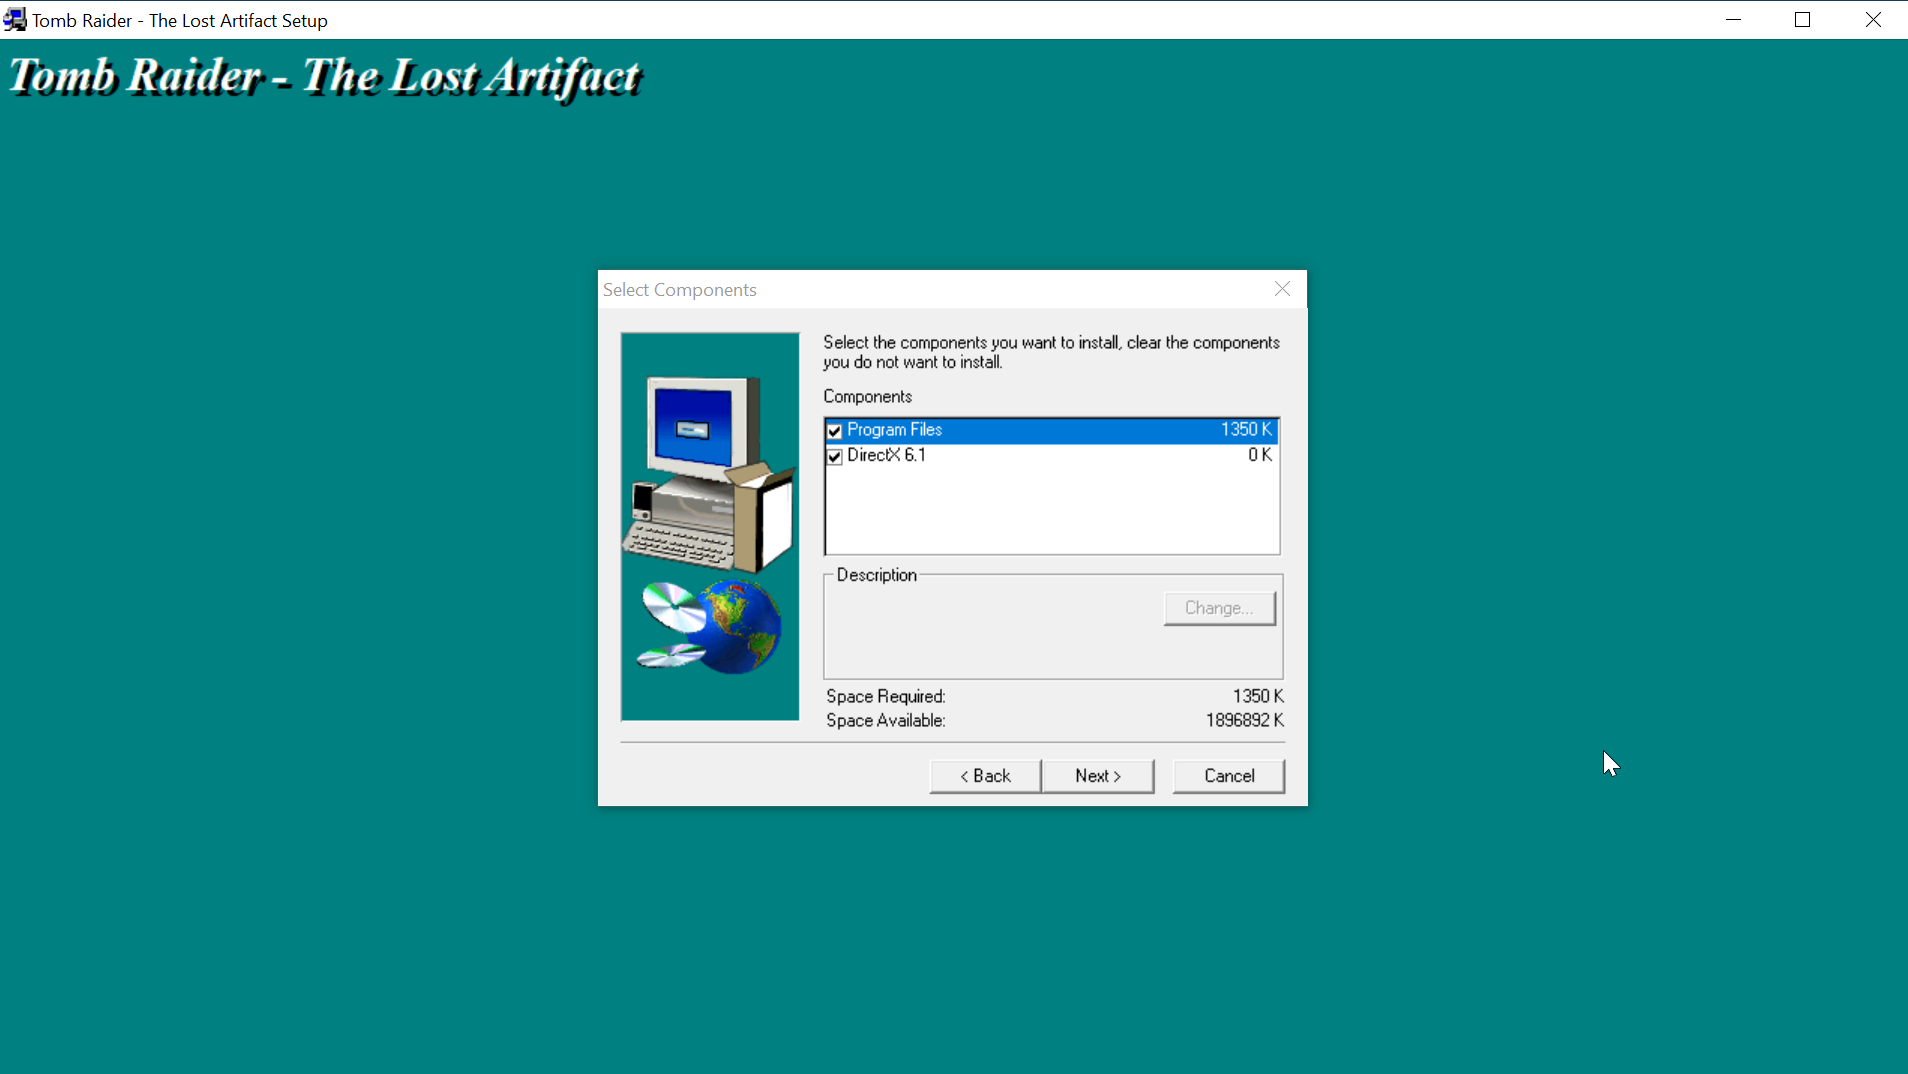
2.4) Installer should install the game fine without any compatibility settings:

3. Running (Win9x or above)
3.1) You can now run the game in its original form. It should work regardless of hardware & OS, and it works on my rig (see “Statement” for info about my setup). But with severe problems (see below).
3.2) At this point game needs an inserted CD / mounted image to work (almost all resources are loaded from the CD):
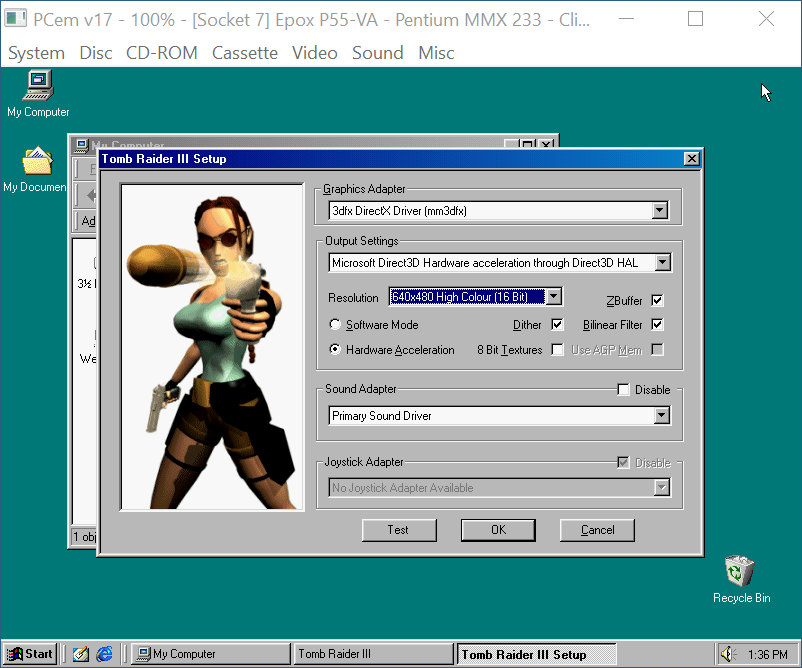
3.3) Launch the game, set up options:
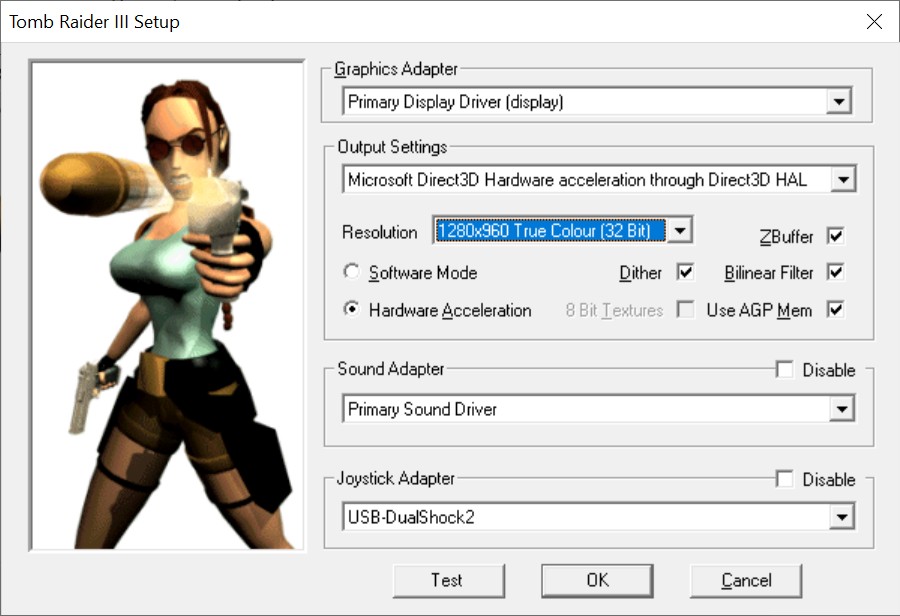
And run it.
The minor problem can be the misaligned screen on higher resolutions (above 800 x 600):
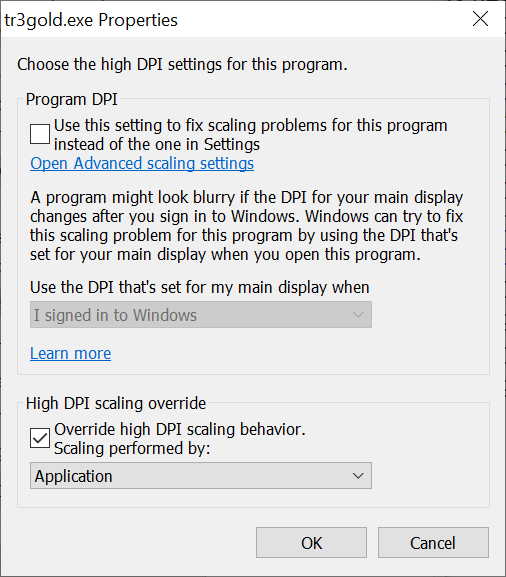
Which can be fixed by changing tr3gold.exe‘s high DPI settings:
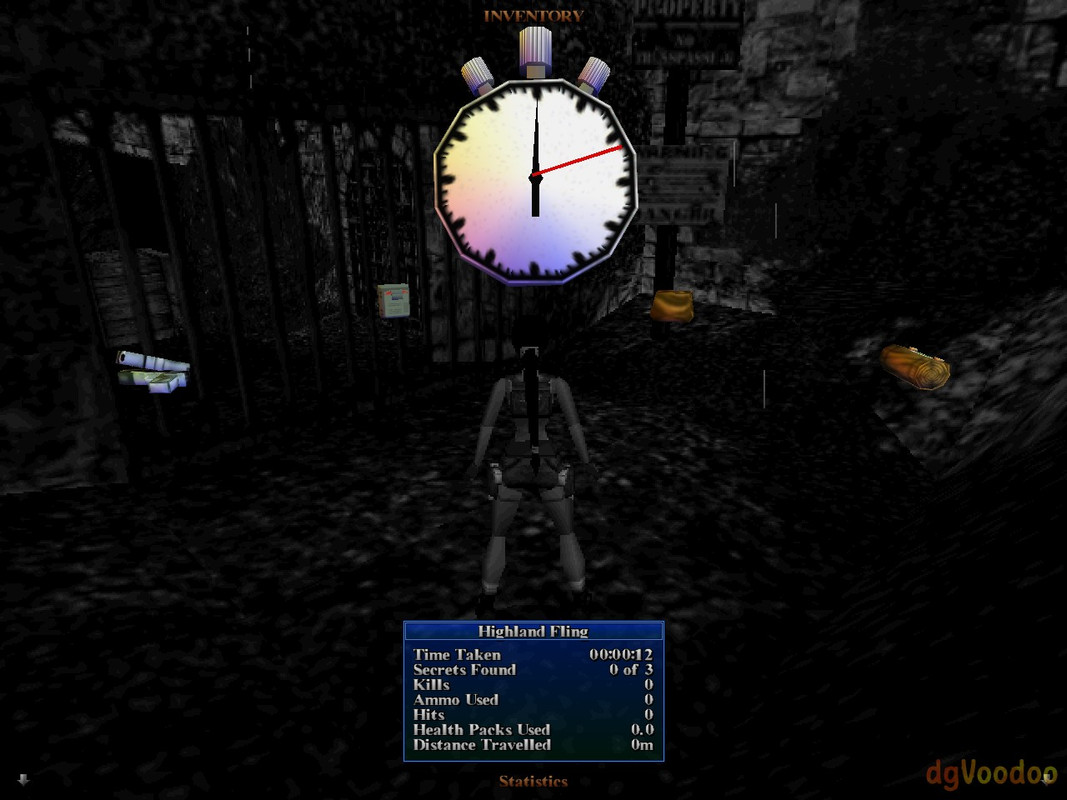
The major problem is 2D elements / font corruption.
It’s visible in main menu’s background (vertical line on Lara) and in game menus (garbled fonts):
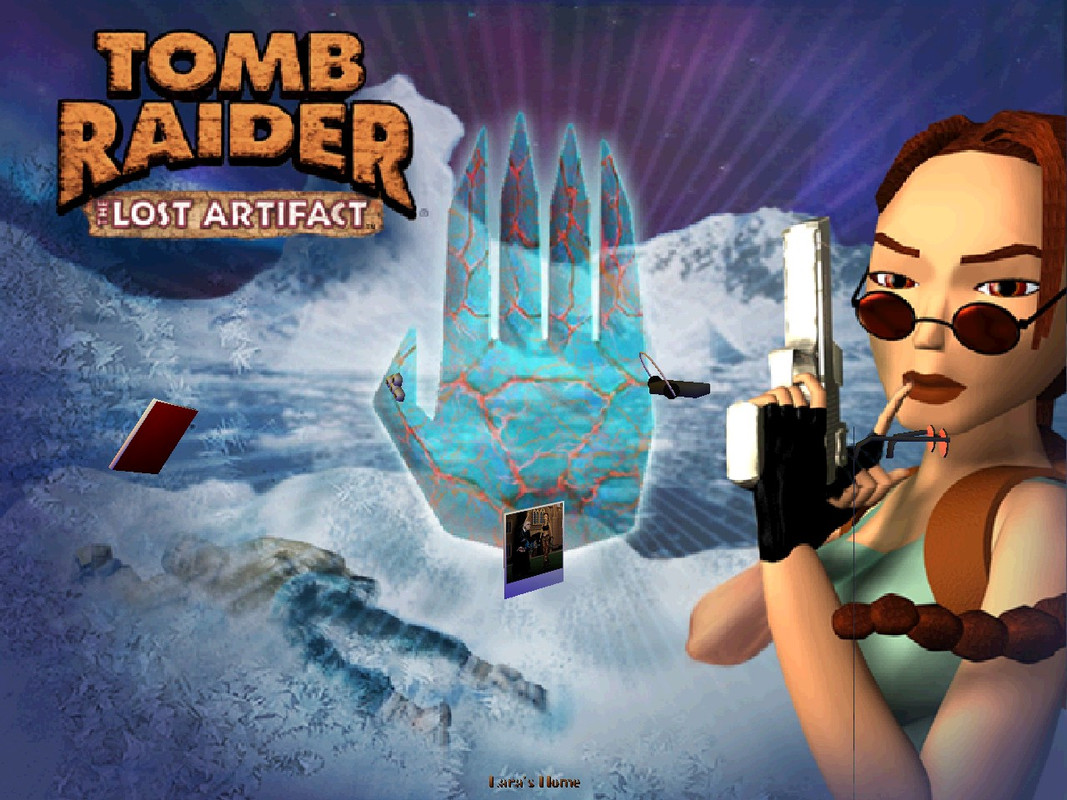
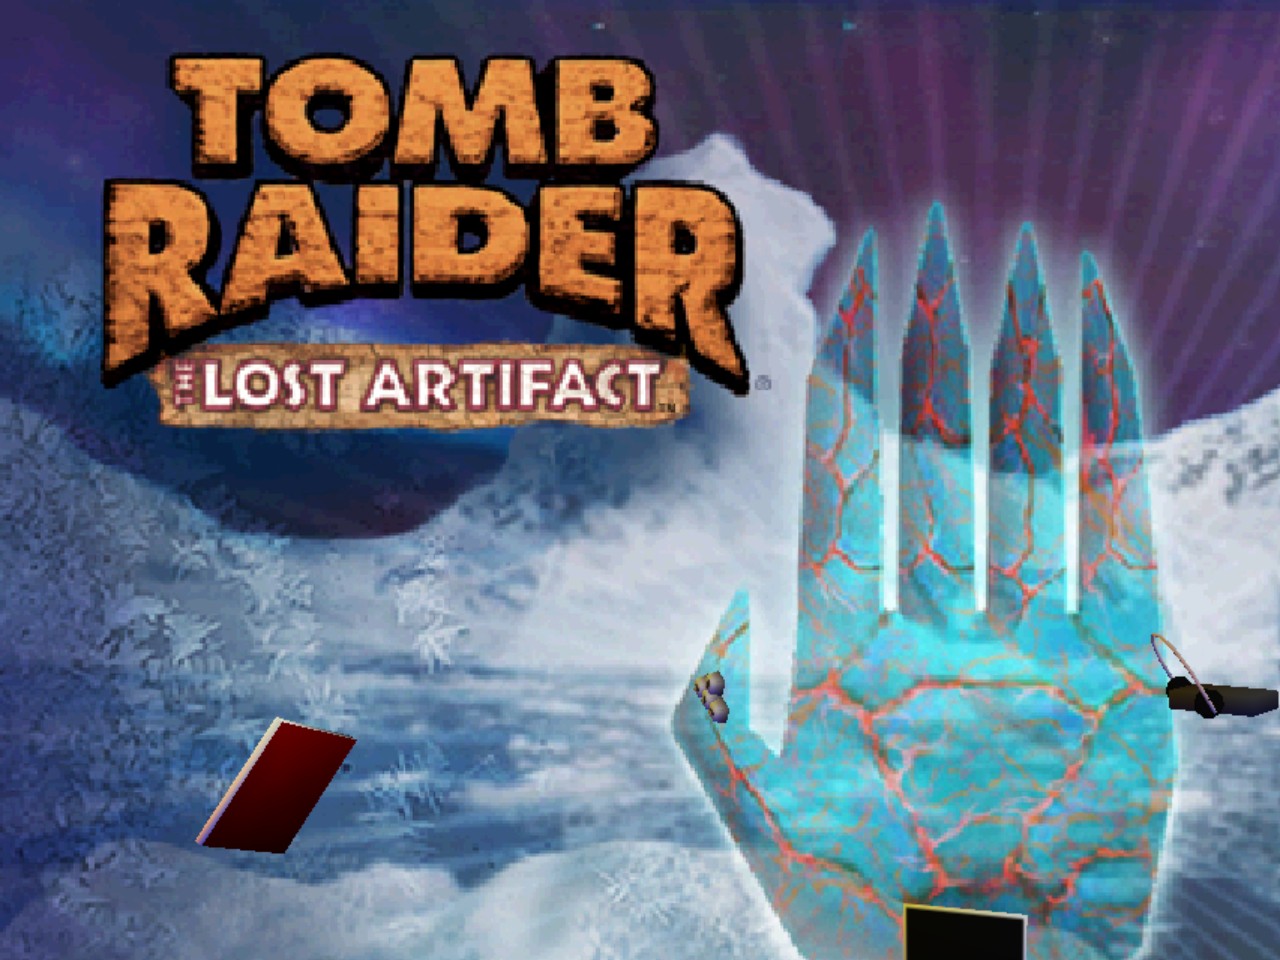
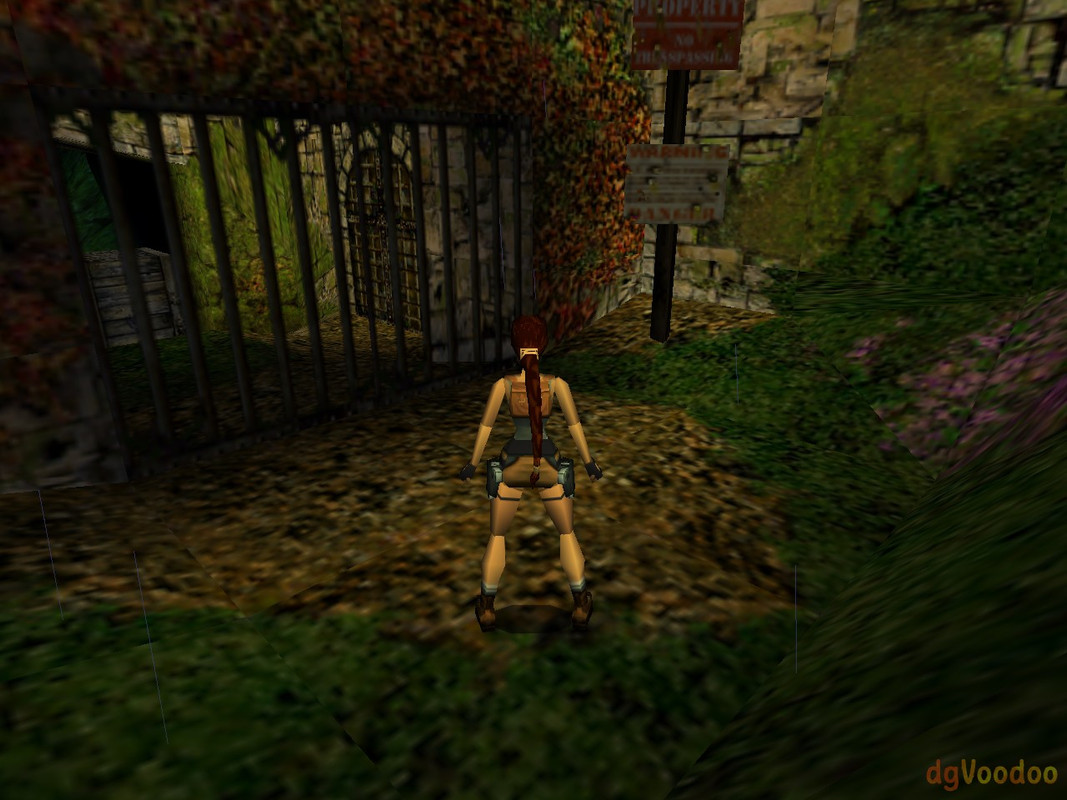
Anyway, game looks like this (1280 x 960 res, 4:3 AR):
3.4.a) If you’re on old enough hardware & OS (Win98), you can now play the game – it should work without problems described above. But you should consider patching it with an unofficial patch first (GOTO #3.5).
3.4.b) If you’re on old hardware & OS (WinXP, Win7) or modern hardware & OS (Win10, Win11), you should upgrade the game with the compatibility patch, an unofficial patch and use dgVoodoo2 to fix problems described above (GOTO #4).
3.5) To apply an unofficial patch to the game, you should first force it to run entirely from the SSD/HDD. Grab the no-CD crack from GameCopyWorld. I’ve used this one:
Remove the CD protection.
3.6) Copy following folders from the CD to game’s main folder:
- Audio
- Data
- Fmv
- Pix
3.7) Eject CD / unmount image. CD is no longer needed to play the game.
3.8) Apply TR3 – TLA Unofficial Patch by Sardoc.
An unofficial patch that Fixes various issues in Tomb Raider 3 and its addon.
Get TR3 TLA level files 27-Feb-2016.7z from Sardoc’s OneDrive. Extract its conents to game’s main folder, replacing original maps with fixed ones.
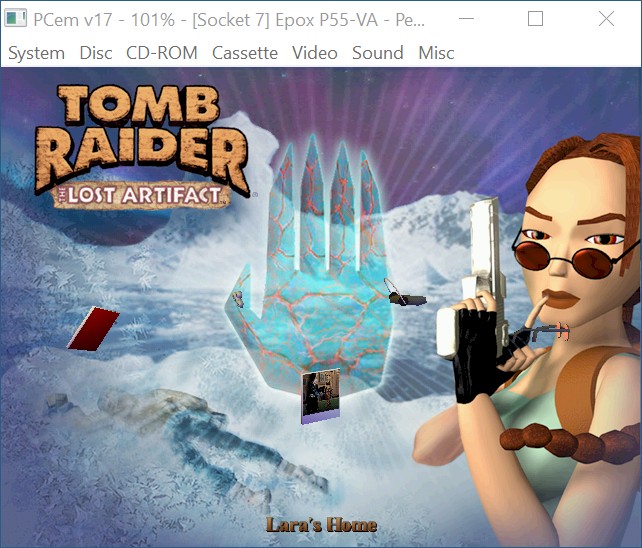
3.9) You can now run the game. Screenshots from this version running on Win98SE in PCem (640 x 480 res, 4:3 AR):
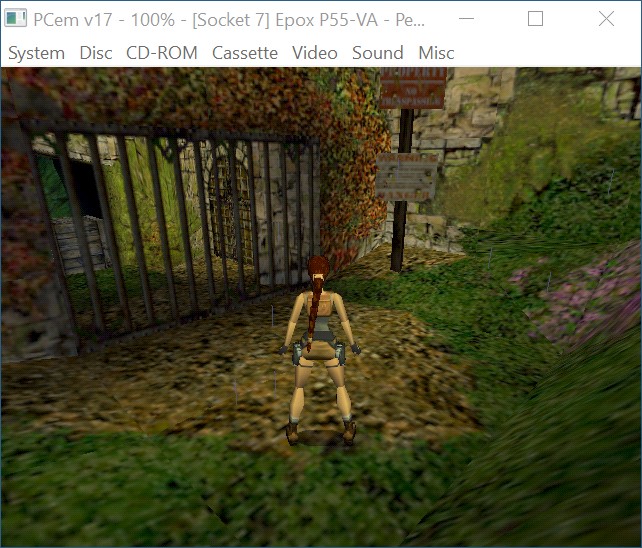
As you can see, no 2D / font corruption.
3.10) Bonus: If you want to speed up game’s launch by disabling first FMV, go to \Fmv\ subfolder and rename / delete Logo.rpg.
4. Running (WinXP or above)
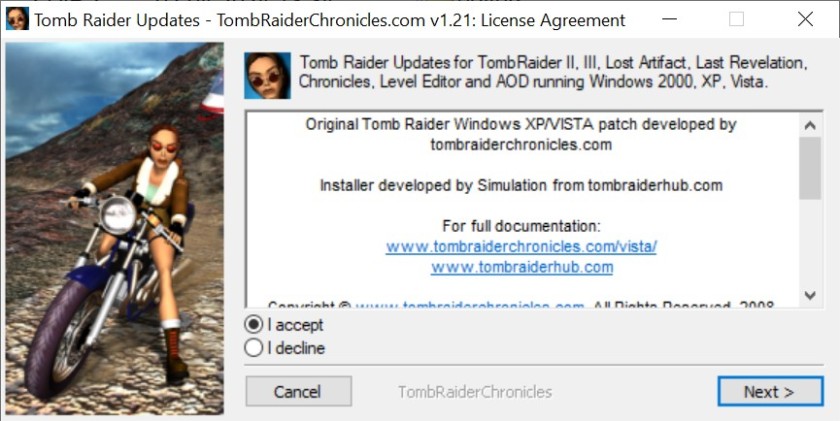
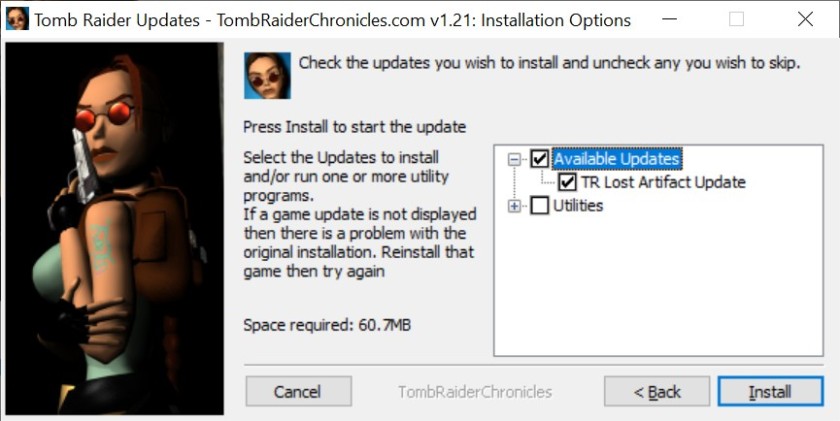
If you’re on an OS newer than Win98, you should first enhance your TR3 installation with Tomb Raider Series Multi Patch. It fixes some compatibility problems by modifying tr3gold.exe and replacing two .dll files (Winplay.dll & Winstr.dll) with newer versions.
Sadly, in case of TLA, it neither copies all game files from CD to game’s main folder, nor removes CD protection. Both these things have to be done manually.
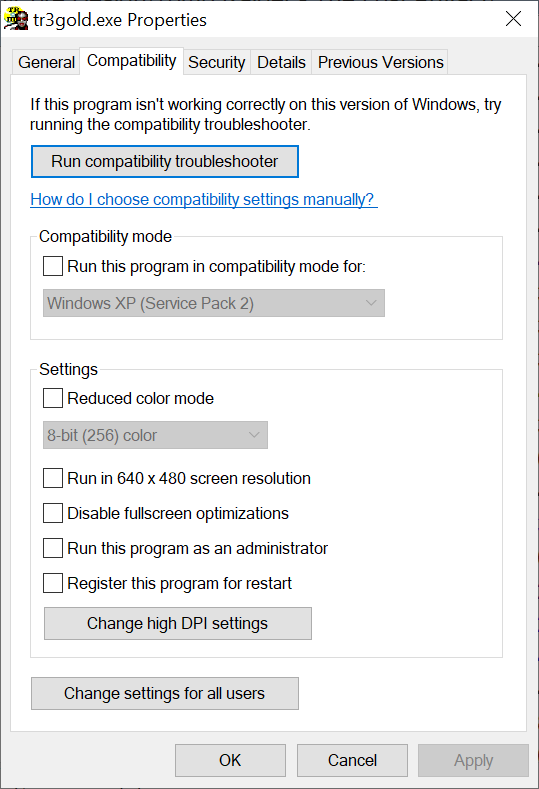
4.1) Grab the Multi Patch from Tomb Raider Chronicles. Extract trupdate.exe from .zip and run it:
After the update finishes installation, disable tr3gold.exe‘s “Win98 / WinMe” compatibility setting (it’s not necessary when using dgVoodoo2):
4.2) Grab the no-CD crack from GameCopyWorld. I’ve used this one:
Remove the CD protection.
4.3) Copy following folders from the CD to game’s main folder:
- Audio
- Data
- Fmv
- Pix
4.4) Eject CD / unmount image. CD is no longer needed to play the game.
4.5) Apply TR3 – TLA Unofficial Patch by Sardoc.
An unofficial patch that Fixes various issues in Tomb Raider 3 and its addon.
Get TR3 TLA level files 27-Feb-2016.7z from Sardoc’s OneDrive. Extract its conents to game’s main folder, replacing original maps with fixed ones.
4.6) At this point we should address the 2D / font corruption.
As long as it affects you, OFC. If not, you can skip this part.
I remember having it on Win7, I’m not sure about WinXP…
To fix this problem, we will need dgVoodoo2. And (sadly) not the current version, but the older one. I’ve tested various versions of dgVoodoo2, and the last one working properly with TR3 is v2.8.2 (from 10 May 2023).
4.7) Grab dgVoodoo v2.8.2 from Dege’s site and extract following files to game’s main folder:
- dgVoodoo.conf, dgVoodooCpl.exe from .zip’s main directory
- D3D8.dll, D3D9.dll, D3DImm.dll, DDraw.dll from the MS\x86\ subdirectory
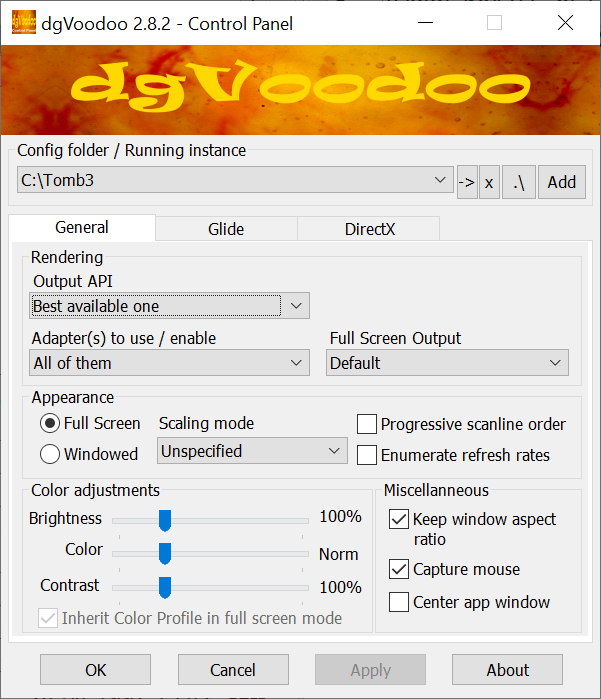
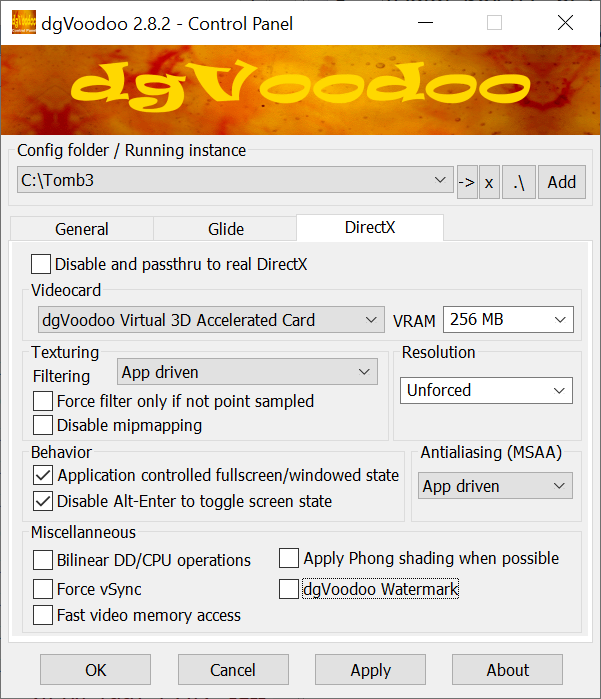
Configure dgVoodoo2:
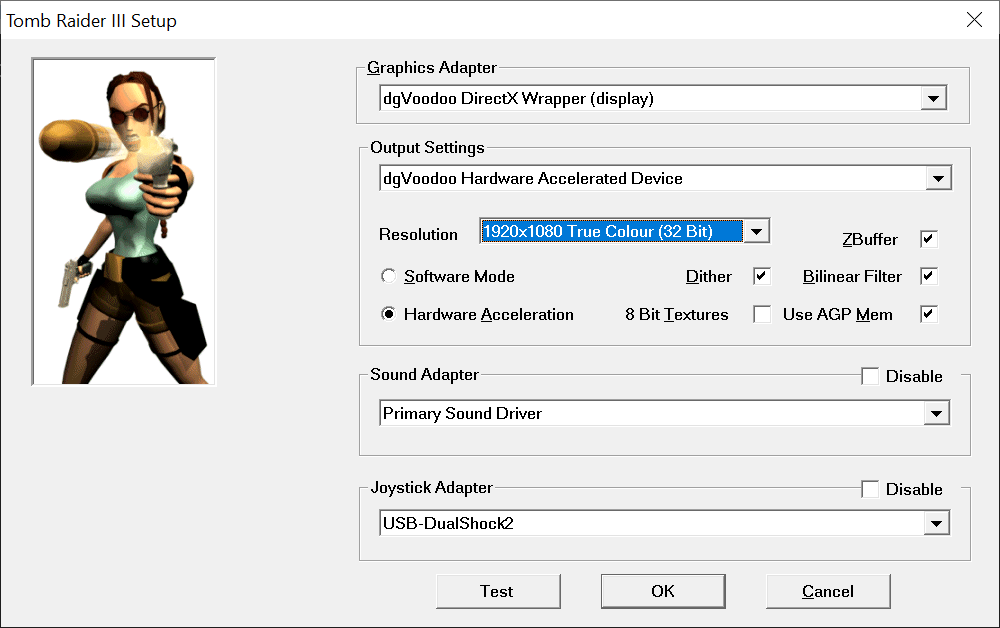
4.8) Launch game’s setup either via Start Menu link or by running tr3gold.exe with the “-setup” parameter. Set up options (notice emulated graphics adapter):

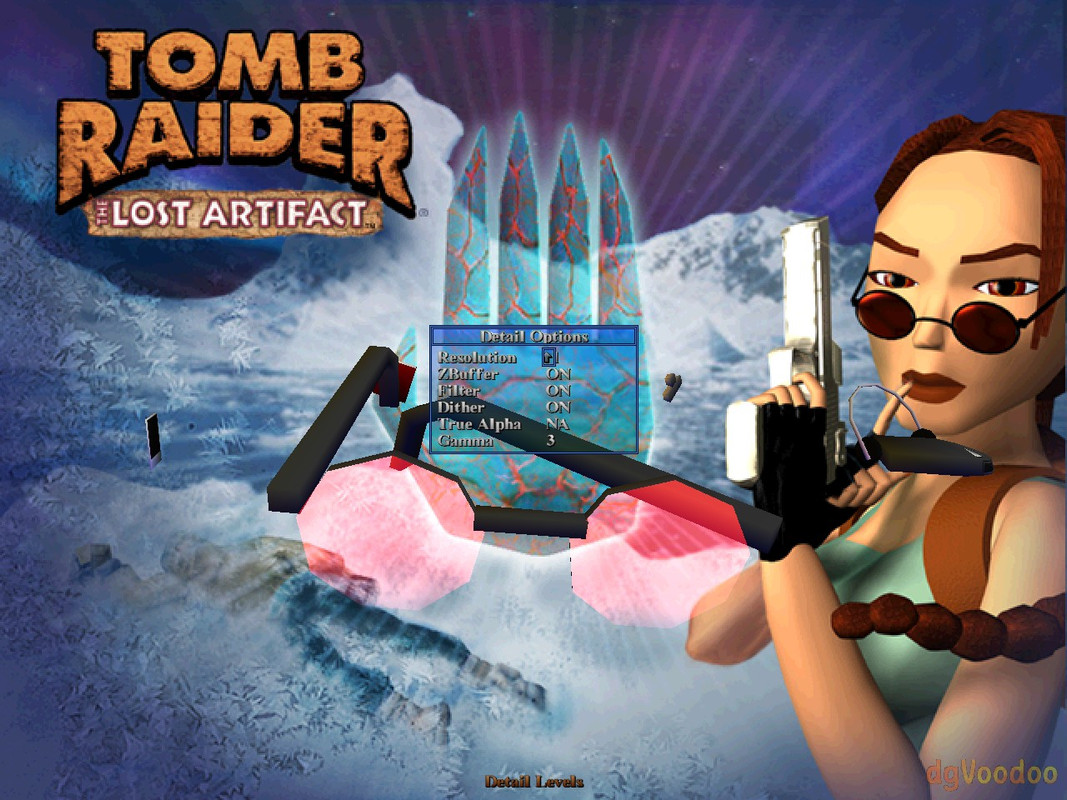
And run the game. It now looks like this (1280 x 960 res, 4:3 AR):
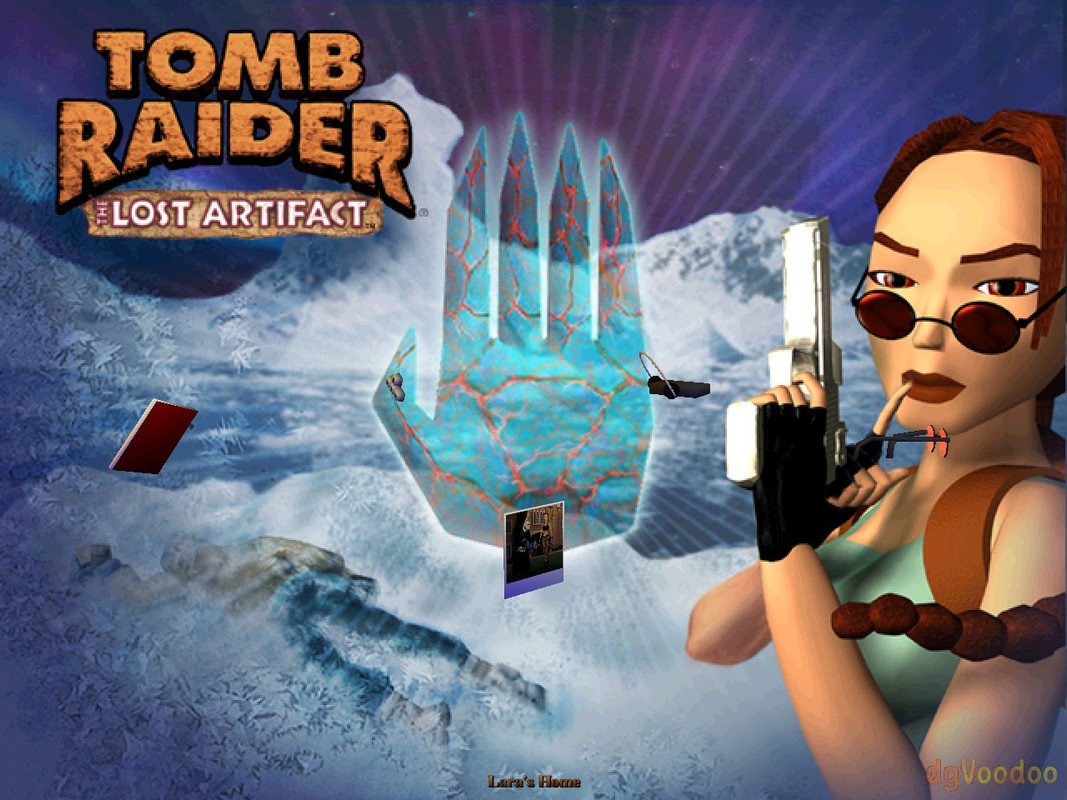
And all 2D / font corruption should be gone.
Warning!
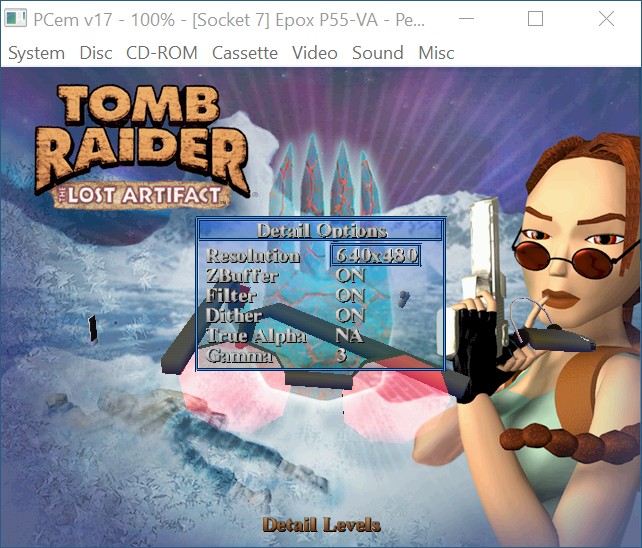
Avoid accesing “Detail Options” while using dgVoodoo2:
If you do, game will crash with 100% certainty when you access “Game” menu (a.k.a. the “passport”). So, choose all options via Setup window, and avoid the Detail Options ingame.
This bug is fixed when using TR3 Decompilation Project (see #6).
4.9) Bonus: If you want to speed up game’s launch by disabling first FMV, go to \Fmv\ subfolder and rename / delete Logo.rpg.
5. Proper widescreen
So, game finally works properly. But what it you wanted to run it in non-standard aspect ratios? Well, it’s totally doable.
Game supports widescreen resolutions out of the box (at least when using dgVoodoo2):
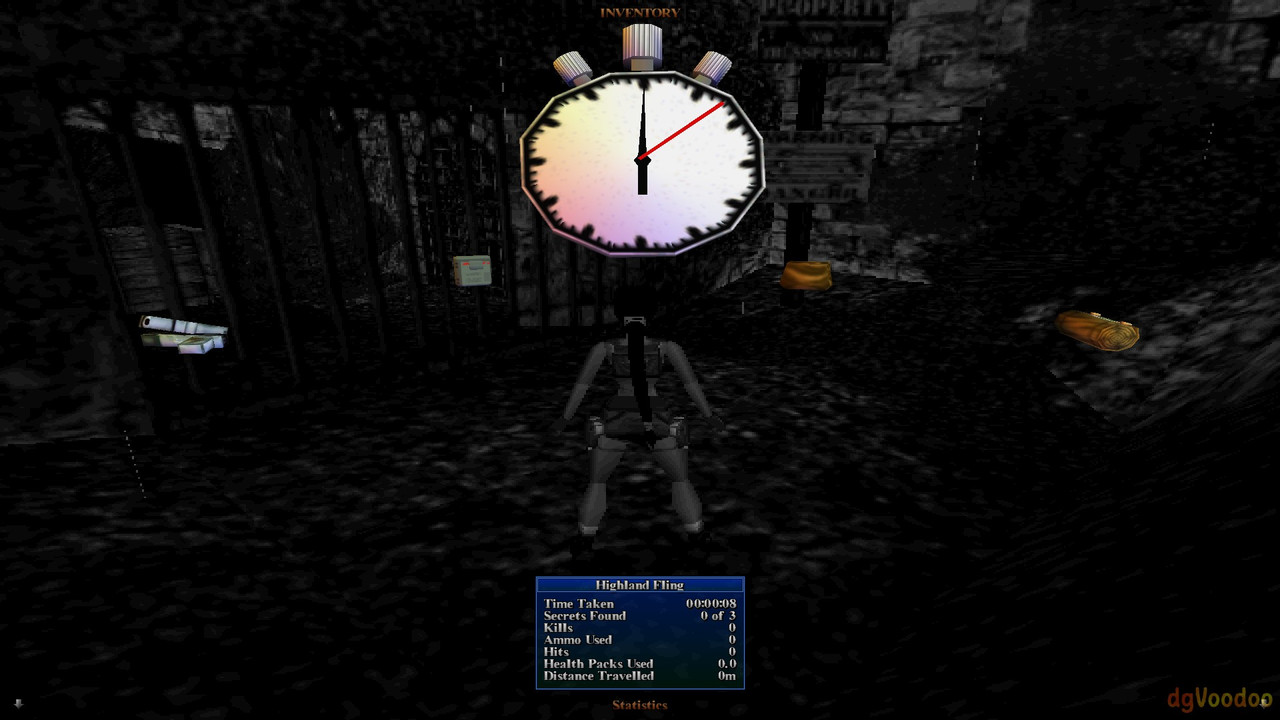
But both 3D elements & 2D backgrounds are stretched horizontally:


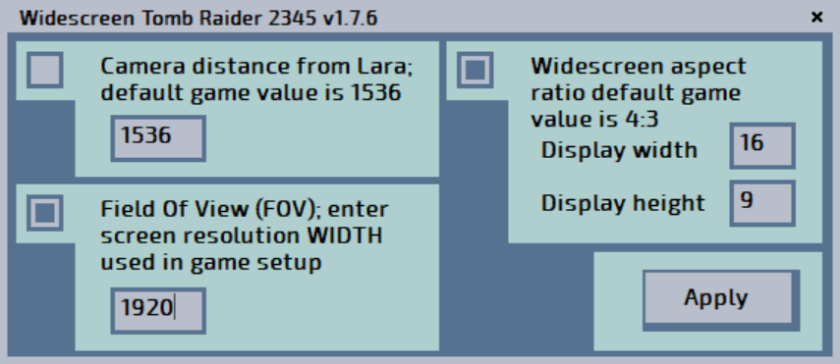
5.1) To fix 3D elements, you’ll need Tomb Raider 2-3-4 Widescreen Patch. Get it from Stella’s Tomb Raider Site. Extract widescreen_tomb_raider_2345.exe from the archive to game’s main folder. Run it and set up your desired resolution, aspect ratio and optionally, non-default camera distance:
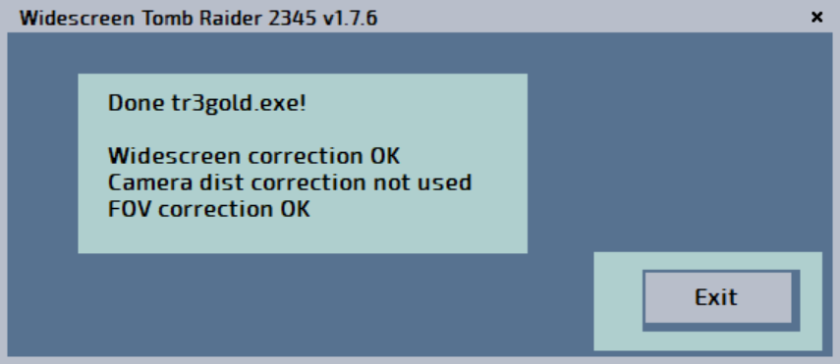
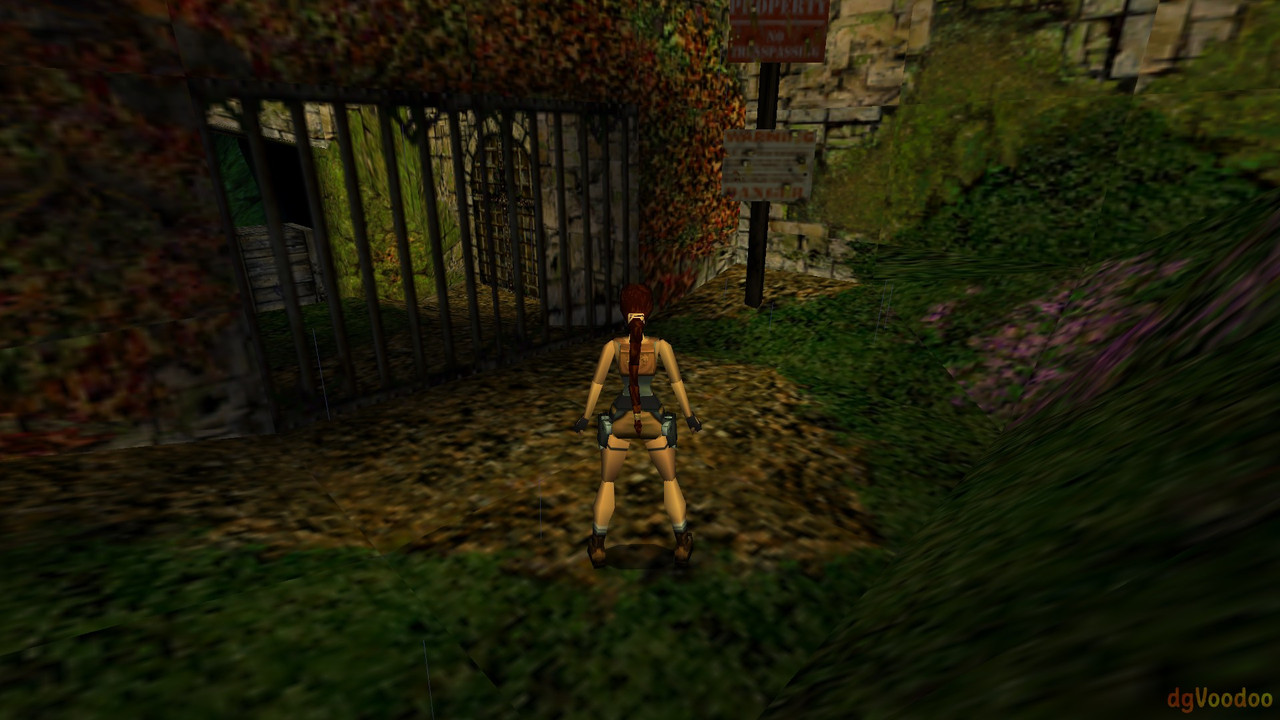
3D elements should now be fixed:


5.2) To fix 2D backgrounds, you’ll need TR 2-5 Widescreen Fix by TRTJA. Get it from TRTJA’s Google Drive folder. Extract contents of \TR III Gold Widescreen Pix\ subdirectory from TR 2 – 5 Widescreen Fix.rar to game’s main folder (overwriting old .bmp files).
2D backgrounds should now have proper aspect ratio. As long as your resolution has 16:9 AR…
6. Running (Win10 or above)
There’s still one more thing you can enhance the game with. But AFAIK only on modern OS (Win10 / Win11). And that’s Tomb Raider 3 Decompilation Project by Trxyebeep.
Basically it’s another unofficial patch, which adds more fixes and allows many modifications, similarly to what TR1x & TR2Main do. But it’s not a full-fledged source port (yet) like those two. It doesn’t add new rendering options or modern gamepad support. But it’s still very useful.
6.1) Grab latest version from Github. Extract contents of Tomb3.zip to game’s main folder
6.2) Rename three folders:
- Data to Datag
- Pix to Pixg
- Saves to Savesg
Folders Audio & Fmv don’t have to be renamed (both TR3 & TLA use the same audio & fmv files).
Detailed usage instructions can be found here. If you configure it right, you can use one setup of TR3 DP to play both TR3 & TLA – that’s why TLA uses folders with -g suffixes.
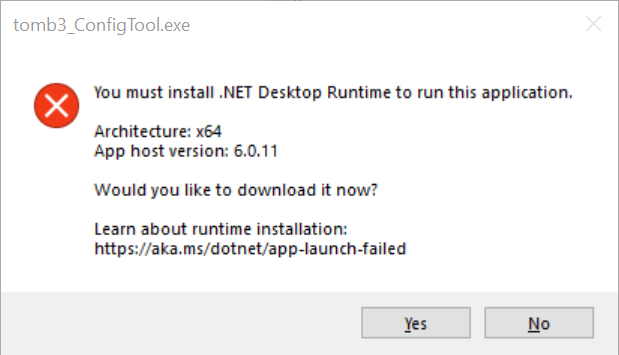
6.3) Get .NET Desktop Runtime 6.0.xx from this link. It’s required for the config tool to run:
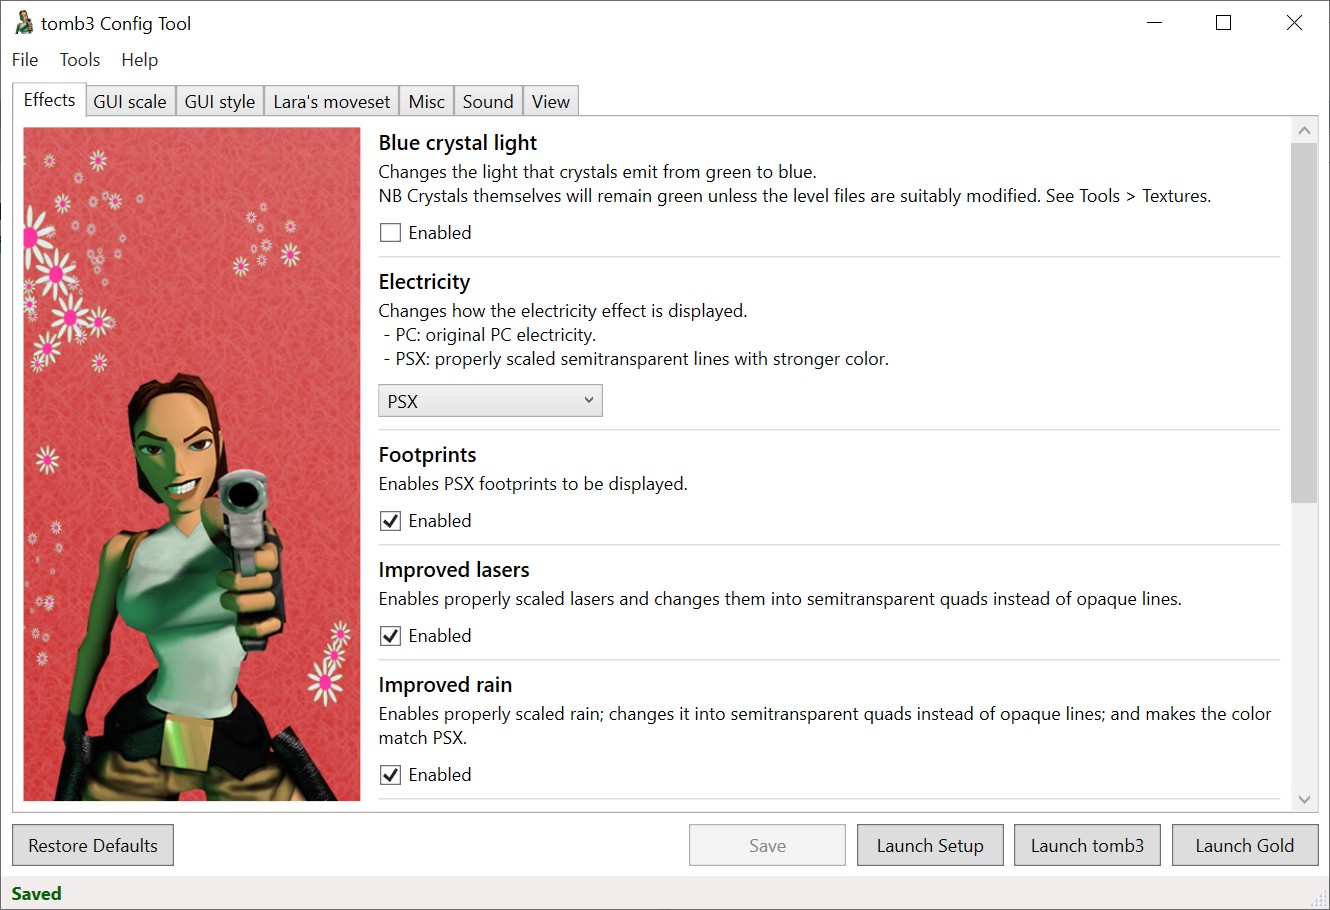
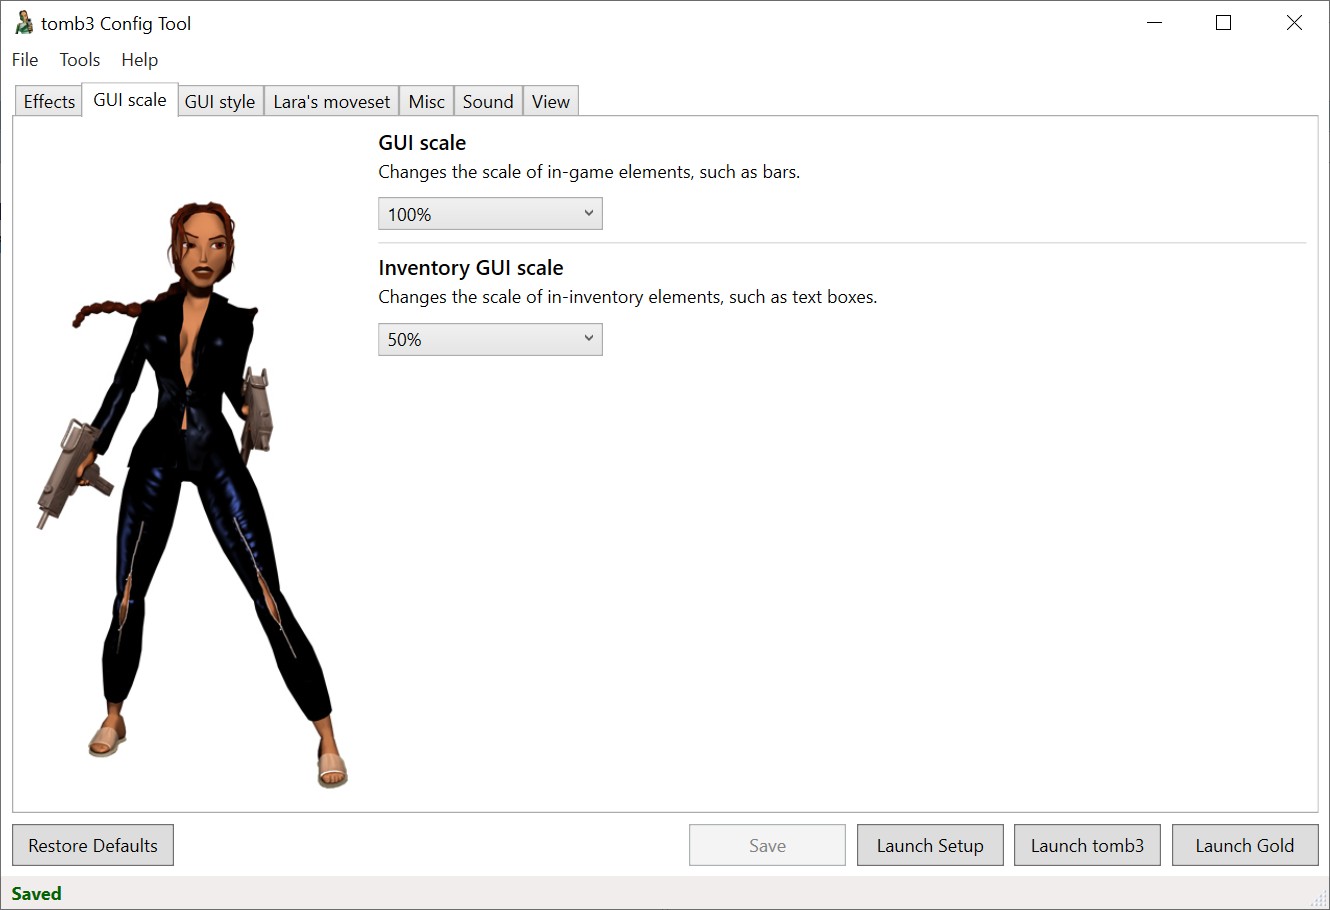
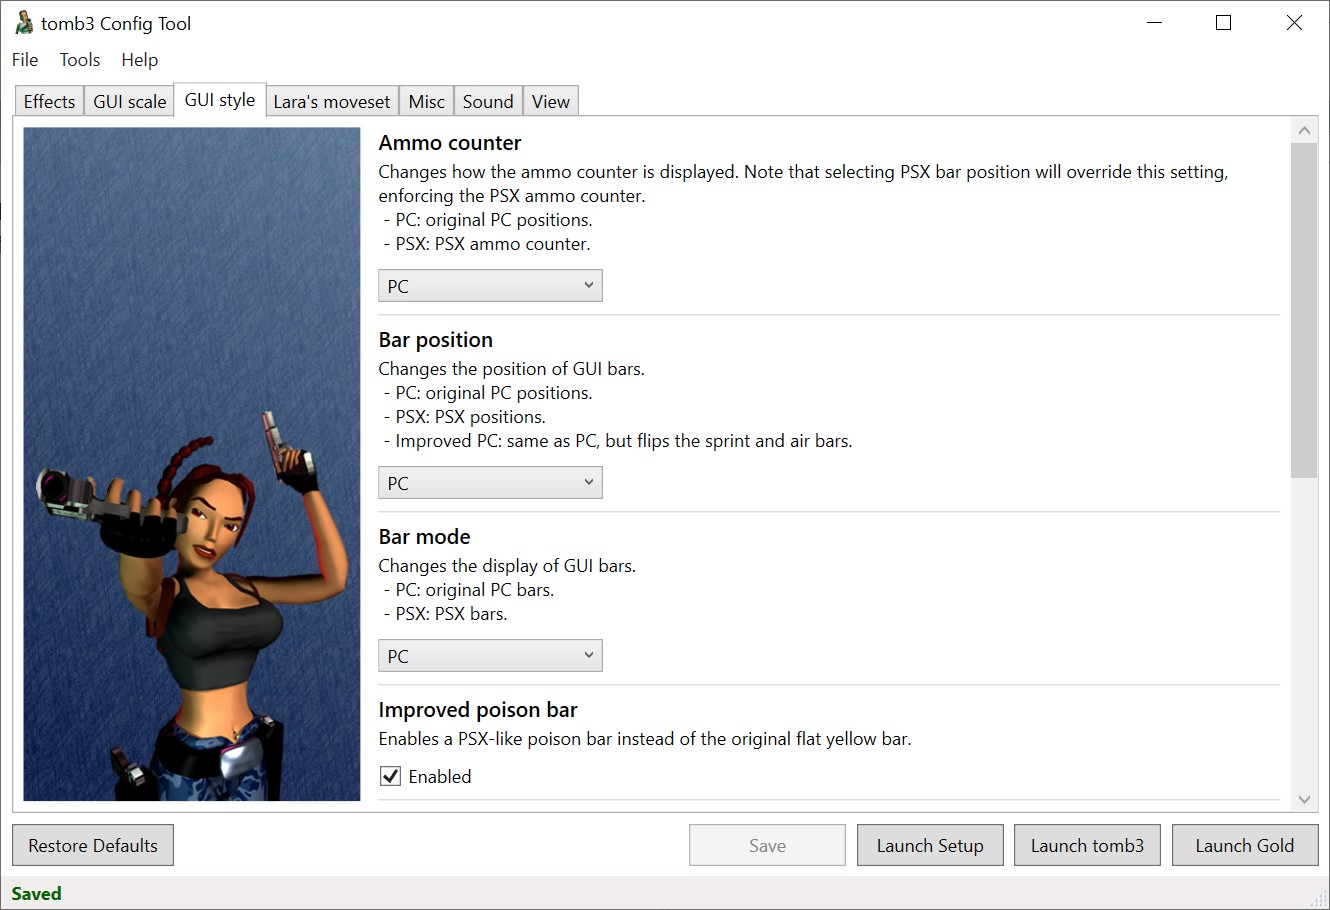
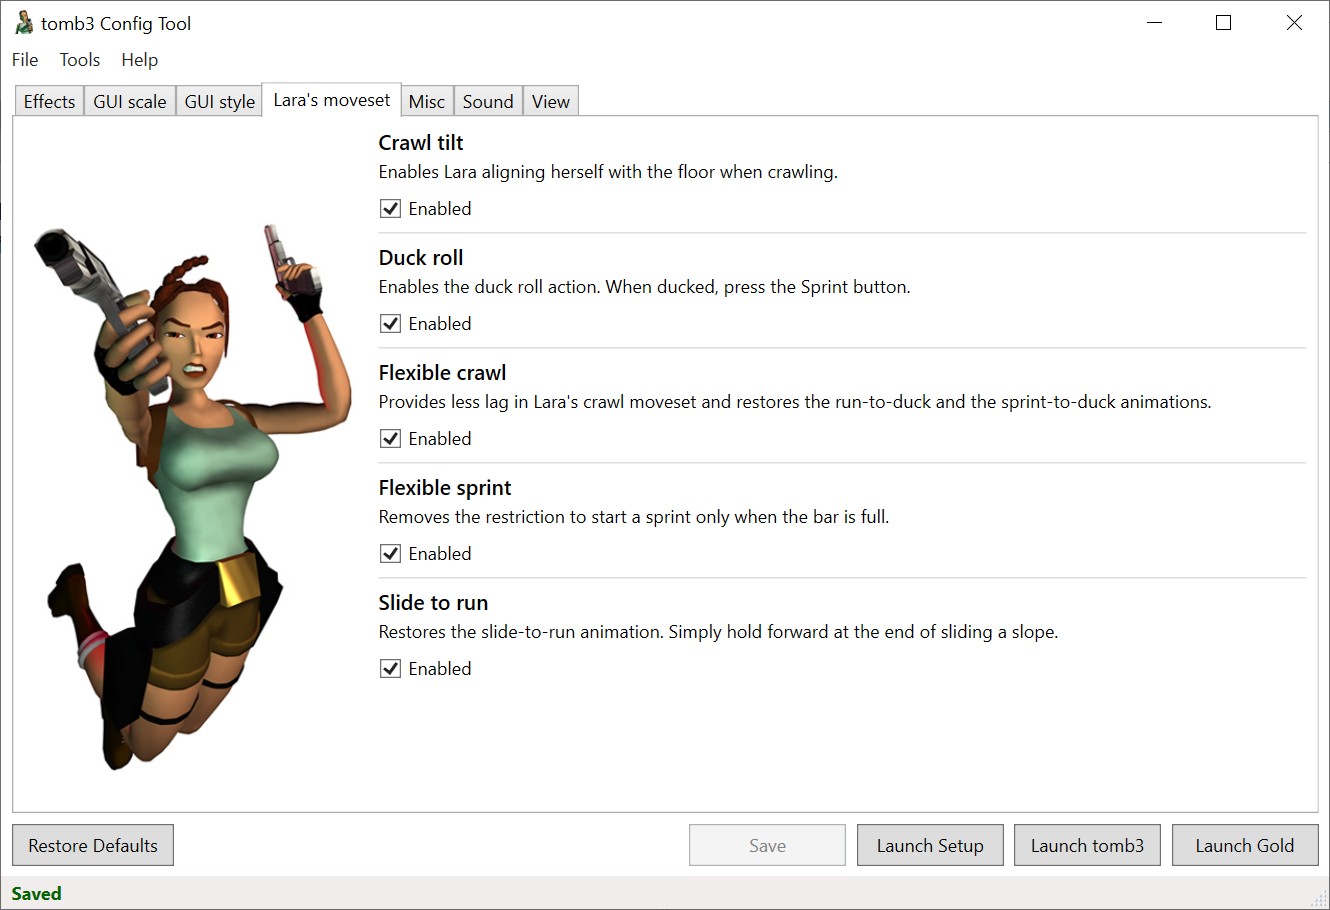
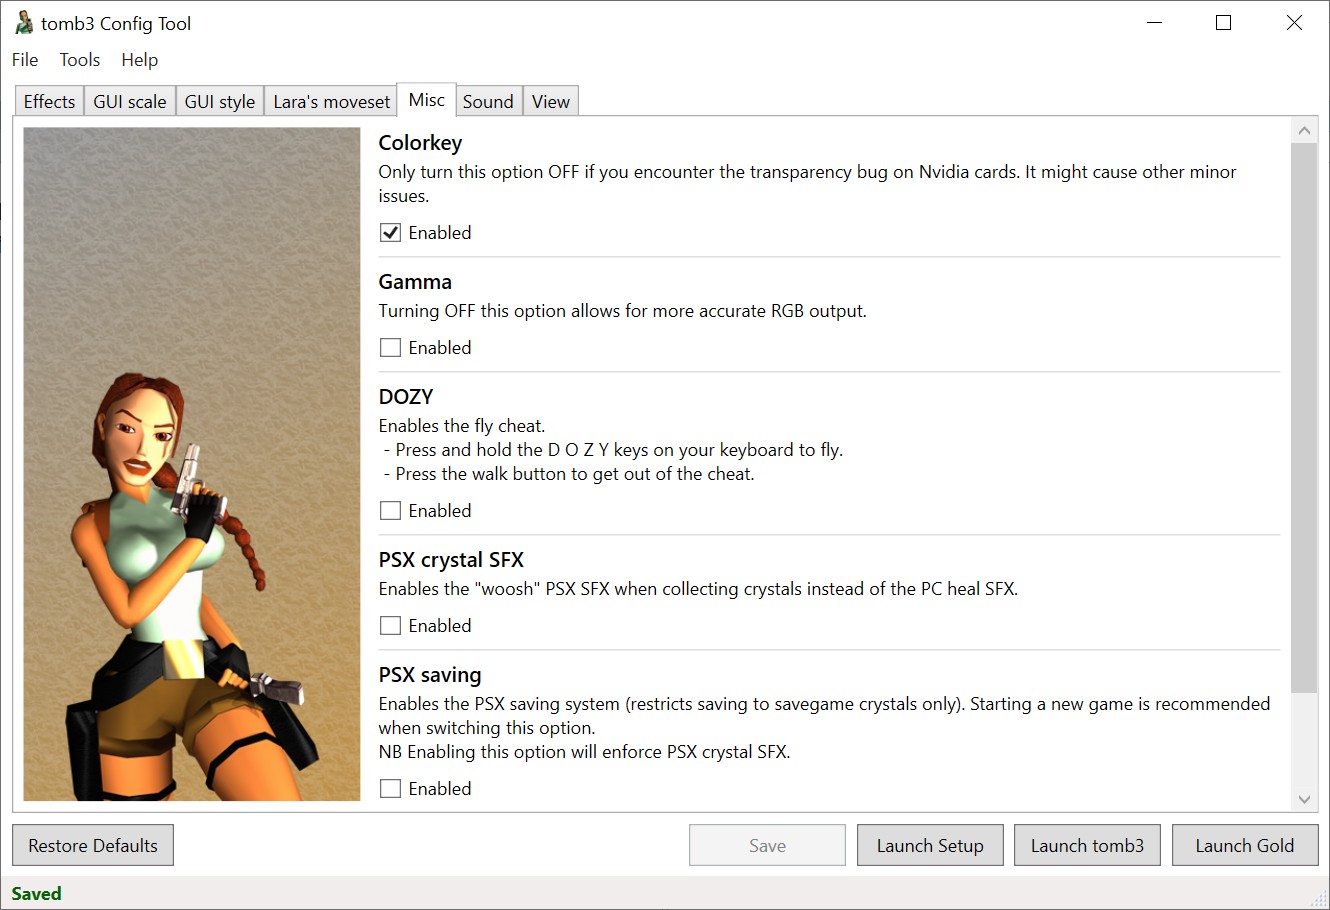
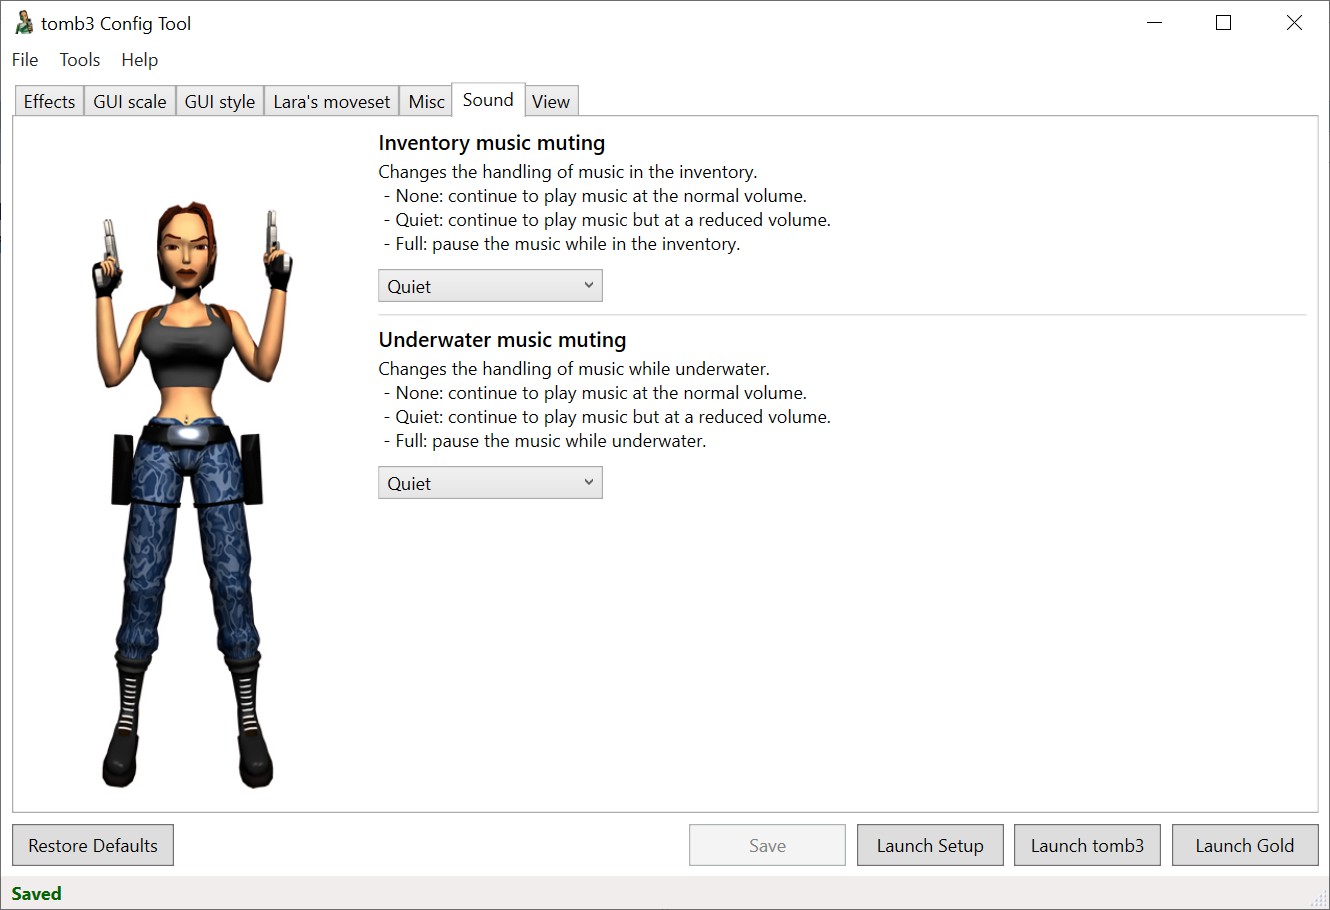
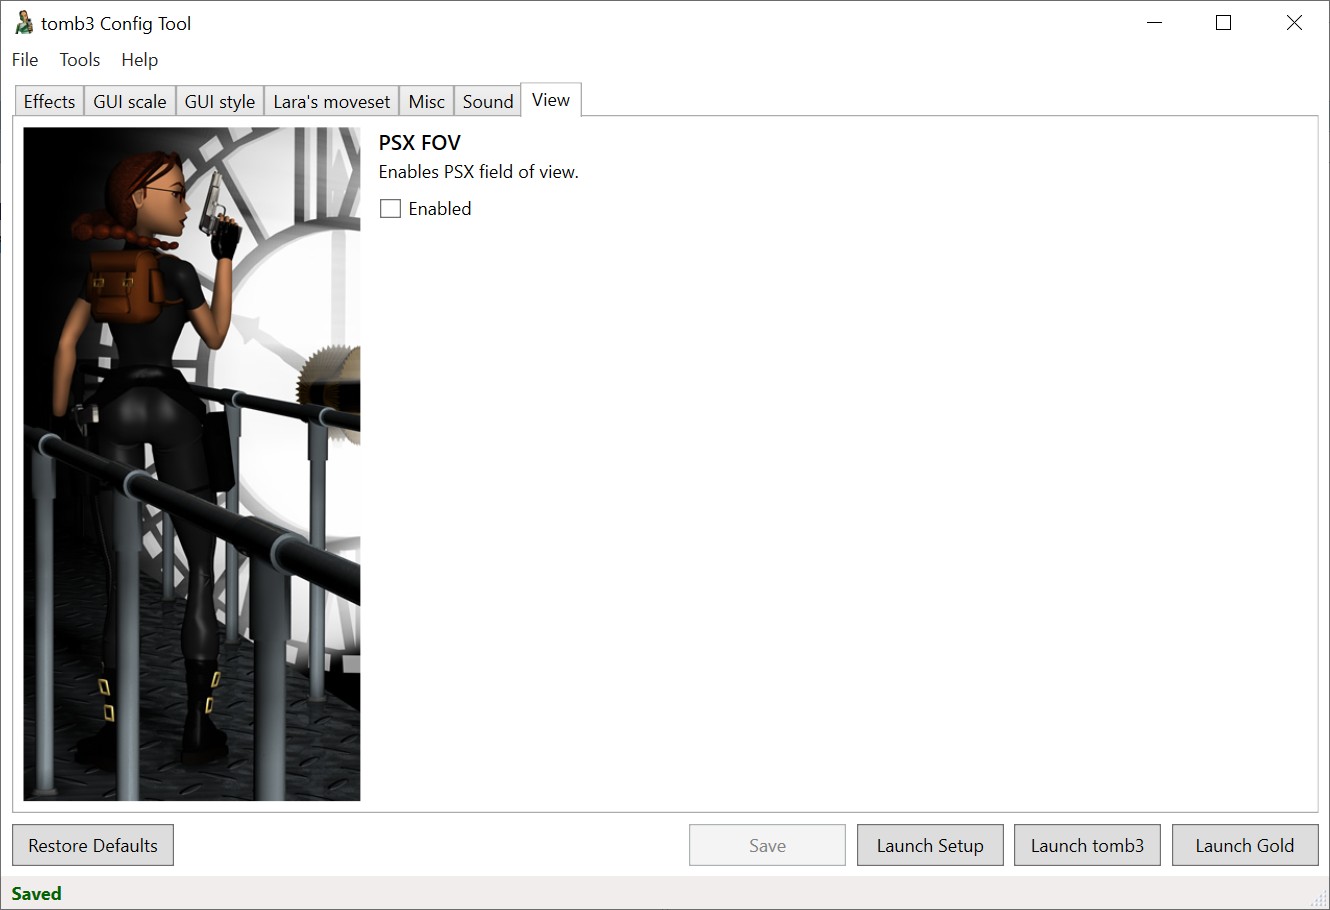
6.4) Run tomb3_ConfigTool.exe. Configure the game. There’s a lot of options here (using default values is generally a good idea for a first-timer):
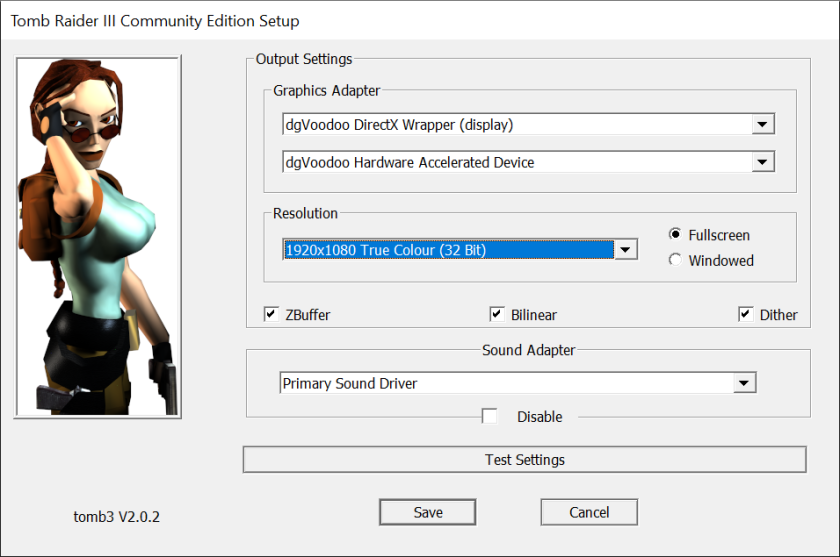
6.5) Launch Setup, configure options (notice less options than before – gamepad is missing for example):
Run the game via the “Launch Gold” button.
a) “Detail Options” can now be accessed without any problems (game no longer crashes after opening the “passport”):

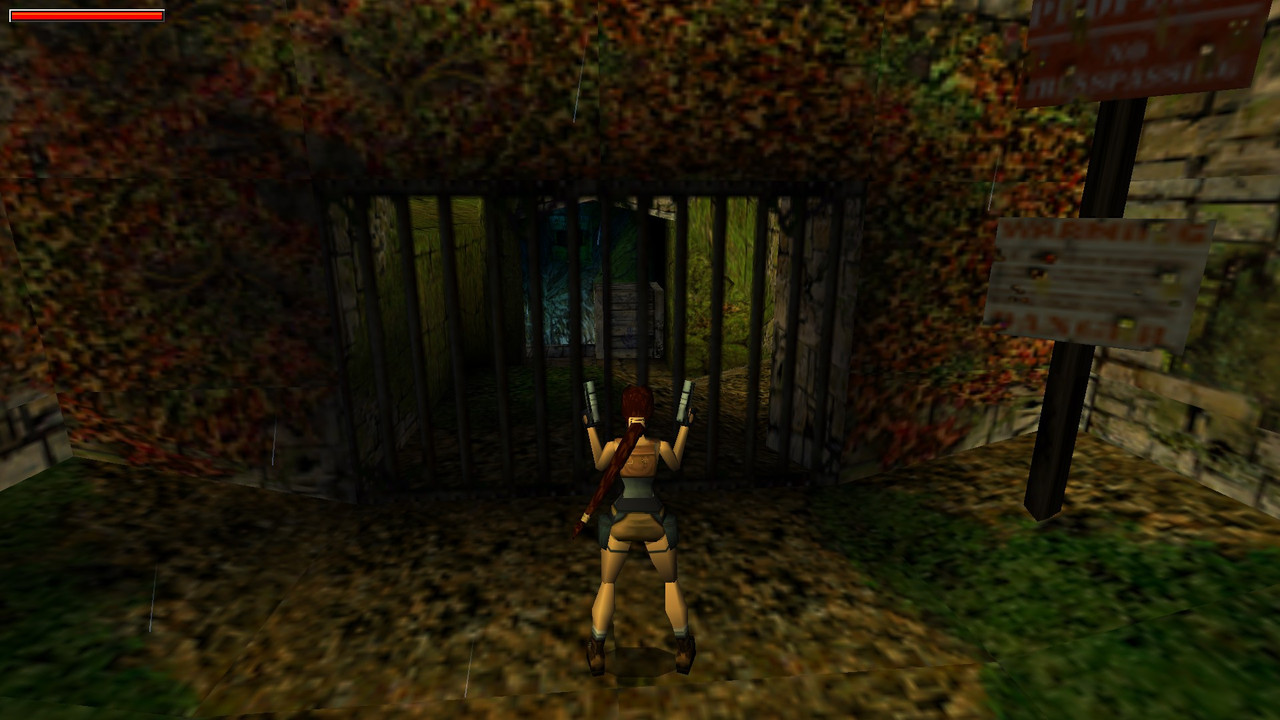
b) Game looks like this:
6.6) The only thing missing ATM is gamepad support. Sadly, AFAIK it’s only doable via the “gamepad input emulates keyboard input” software. I’ve tested JoyToKey with following settings:
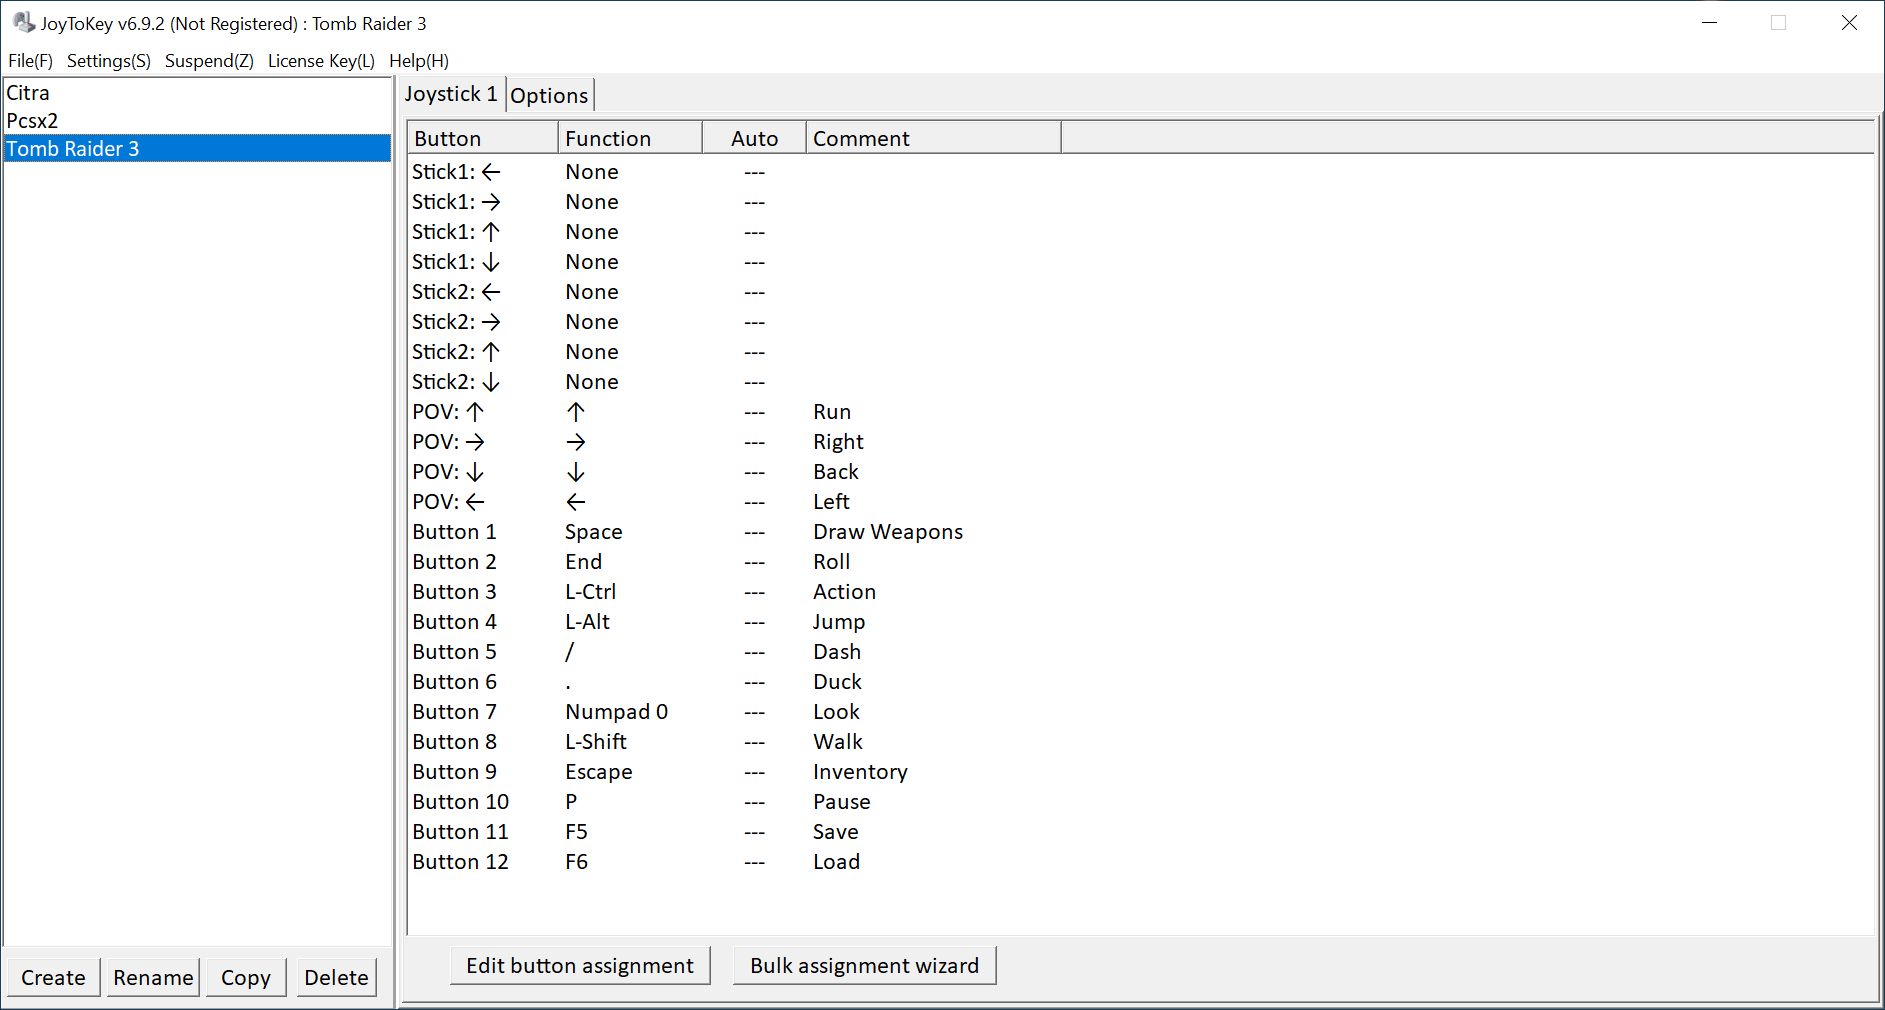
Which worked perfectly.
